In the fast-paced world of software development, transforming abstract ideas into user-friendly products is a constant challenge. Recently, I faced an intriguing task that blurred the lines between web and mobile development: converting a standard reactive web app into an installable, standalone app that would feel like a native mobile experience. The goal was clear—allow users to install the app directly from their browser and interact with it as if it were a fully native mobile application. This involved implementing key features like custom app icons, and splash screens, and ensuring the app launched in fullscreen mode, free of any distracting browser UI elements. However, it’s worth noting that the offline feature was not part of this scope.
This requirement emerged as a high priority late in the project, adding a layer of complexity. For a seasoned developer, this might seem like a typical challenge—until you consider the twist: I had to achieve this transformation using OutSystems, a low-code platform known for simplifying complex tasks. While OutSystems excels at creating native mobile apps, making a reactive web app behave like a native one—complete with installability, fullscreen mode, splash screens, and app icons—required solutions beyond the standard low-code approach. The big question became: Could we replicate a native mobile app experience while sticking to the low code?
Why Transform a Reactive App into an Installable Standalone App?
On mobile browsers, the visible area for a website typically occupies around 85–90% of the screen. The remaining 10–15% is occupied by native elements like the navigation bar (where the website’s URL is displayed) and the status bar (where indicators like the notch and battery are displayed). If your reactive app is designed for various devices but you want it to behave like a native app on mobile, transforming it into a standalone app is highly beneficial. This method offers a more immersive experience, allowing users to access the app directly from their home screen without the interference of browser controls, enabling them to focus entirely on the app’s content and functionality.
The Approach: PWA as a Starting Point
The first hurdle was ensuring users could install the app directly from their browser. We began with the assumption that defining the app as a Progressive Web App (PWA) would be our best bet. The idea was to add specific meta tags to the index file, configure the web app manifest, and then allow users to launch the app from their home screen. This approach is fairly standard when developing PWAs, but the challenge was adapting it to work within the constraints and capabilities of OutSystems. To overcome these challenges, we combined OutSystems with traditional methods. We leveraged OutSystems components like the Web App Manifest and the SEO Utils on Steroids Library to handle much of the installability logic. But, we also incorporated custom HTML, CSS, and JavaScript to fine-tune the experience. This approach allowed us to replicate native behaviors—without the need to write platform-specific native code.
Below are the steps to Transform a Reactive App into a Standalone App:
 |
 |
 |
|---|---|---|
| Standalone Mode removes browser UI elements like the address bar and navigation controls, creating a full-screen experience. | A custom launch Icon ensures that the web app is visually represented on the user’s home screen like a native app. | The next step to make your Web App more native-like is to replace the dull, white launch screen with your image or a custom splash screen. |
How to Transform Reactive App to Standalone App?
There are two ways to make an app run as a standalone application. The first way is to use a set of meta tags in the head element of your HTML code. The second way is to set the properties of the Web App Manifest file. We will be required to use both options and cannot go with either one because, unlike Android, for which many native-like features are automatically generated by the Web App Manifest, iOS requires some additional HTML and CSS tricks. Throughout this guide, I will demonstrate which settings work for Android, and which do not for iOS, along with the necessary adjustments needed to be done to overcome this. Here’s a step-by-step guide to transforming the reactive app.
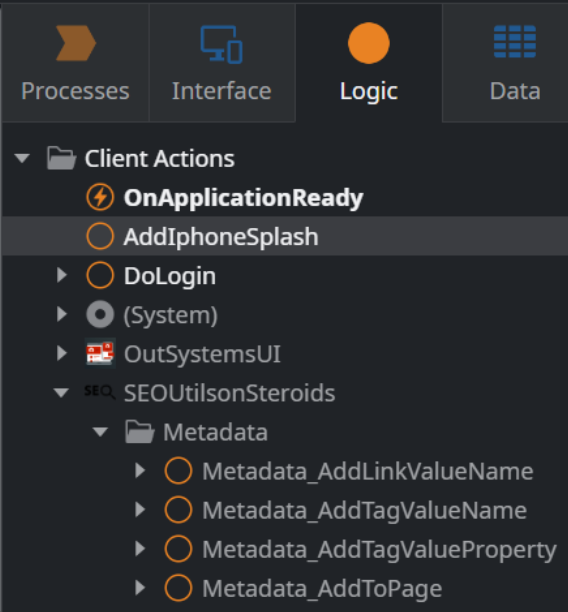
SEOUtilsonSteroid Library in Service Studio - Picture 1
Utilize SEO Utils on Steroids Library
The SEOUtils on Steroids library simplifies SEO and PWA configuration within OutSystems. The library is utilized to append all necessary HTML elements to the head section of the application. This includes essential details such as the location of the manifest file, iOS splash screen images, launch icons, and the preferred theme color. To include the meta tag in your application, follow these steps:
- Add the Library “SEOUtilsinSteroids” from the ODC Portal.
- In Service Studio, select the “Logic” tab and add the System Event “onApplicationReady”.
- Utilize the “Metadata_AddLinkValueName” and “Metadata_AddTagValueName” client actions to add the necessary meta and link tags. By doing this, you ensure that all the essential elements are included in the head section of the HTML code and are properly integrated into your application.
Deploying Manifest File - Picture 2
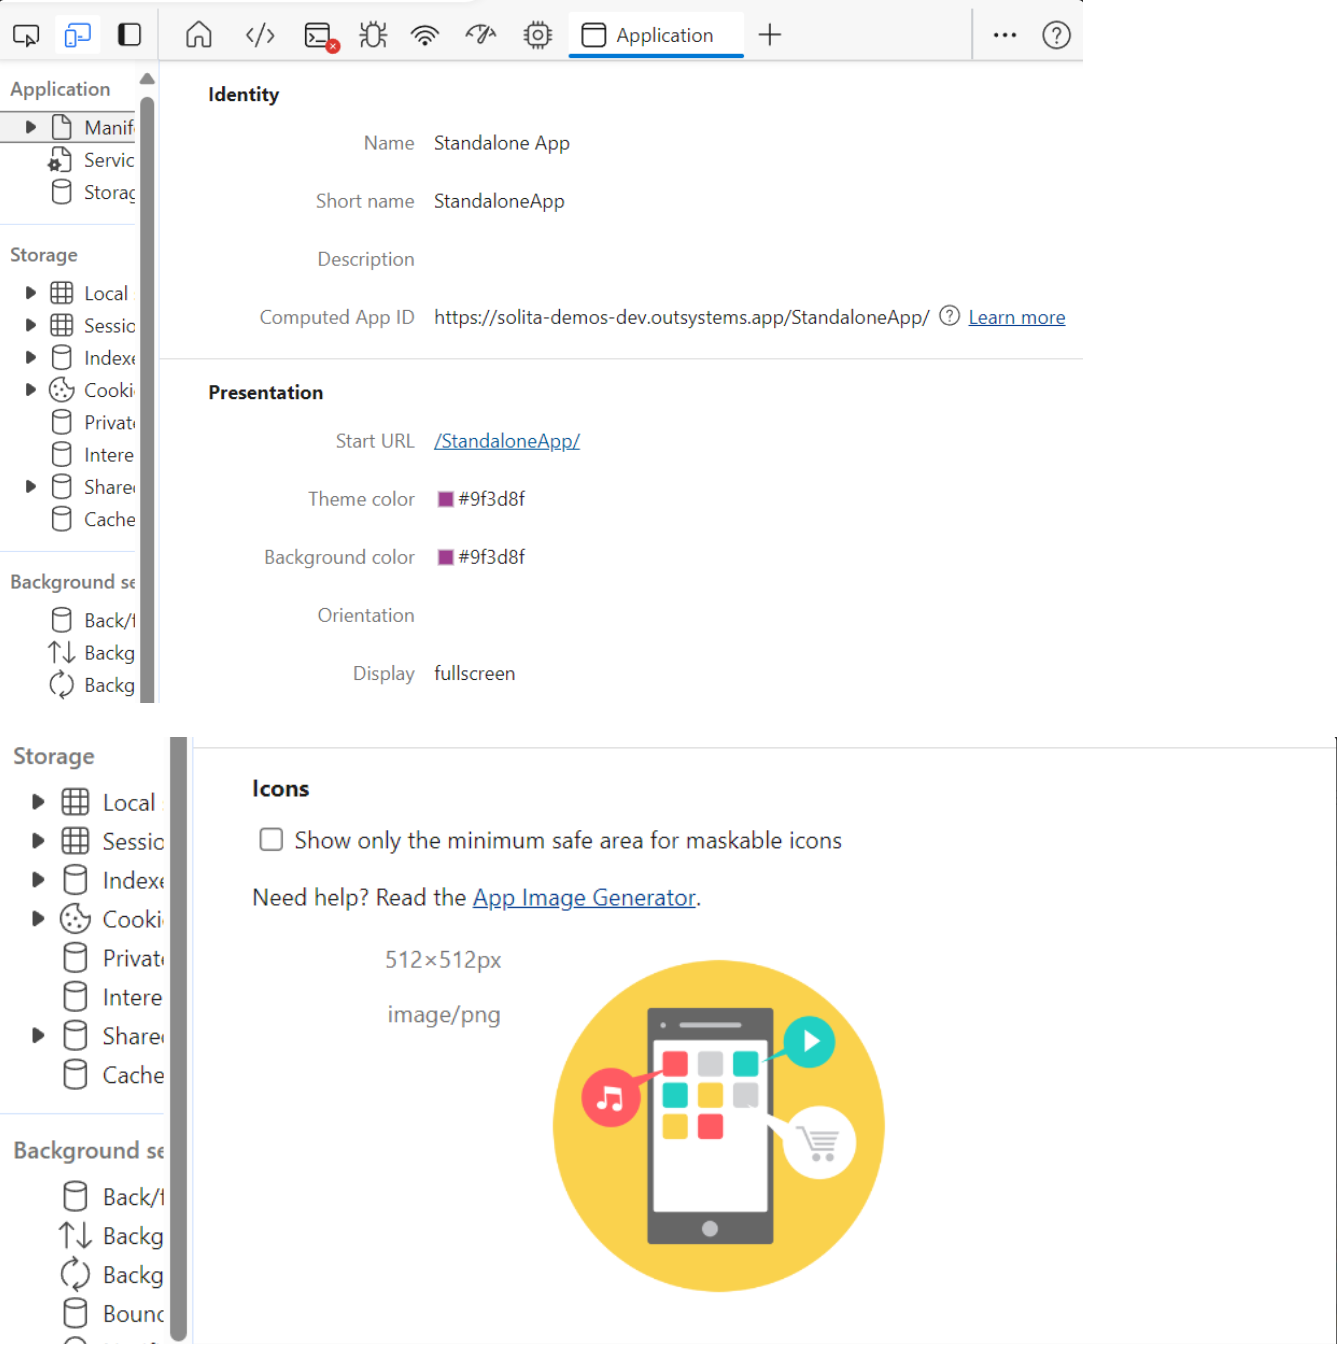
Configure Manifest File
The web app manifest serves as a blueprint JSON file, specifying to the browser how should your web content appear as an app within the operating system. The manifest file facilitates automatic app installability and can be customized to activate fullscreen mode, eliminating the address bar. It includes essential details like the app’s title, icon, preferred theme color, etc.
To include the manifest file in your application, follow these steps:
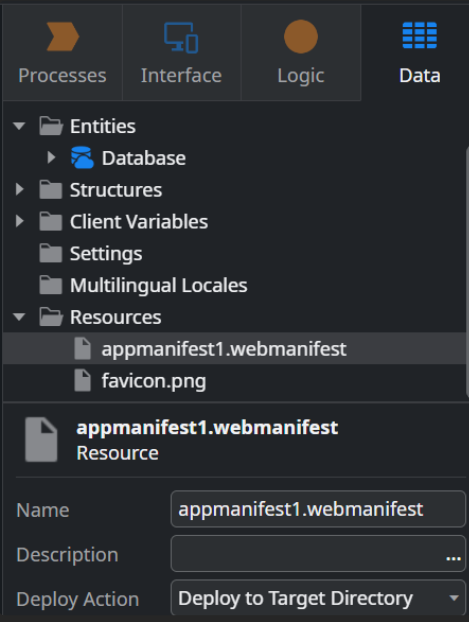
- Configure the necessary settings in the file and save it with the .webmanifest extension. You can find the details of the properties here.
- Include it as a resource in the Outsystems application under the “Data” tab, then set the Deploy Action property to “Deploy to Target Directory.”
- Use the Metadata_AddLinkValueName action from the SEOUtilsonSteroids library to append the manifest file to the head section of your application. By following these steps, you ensure that the manifest file is properly integrated into your application.
Reactive App to Standalone App in 5 Steps
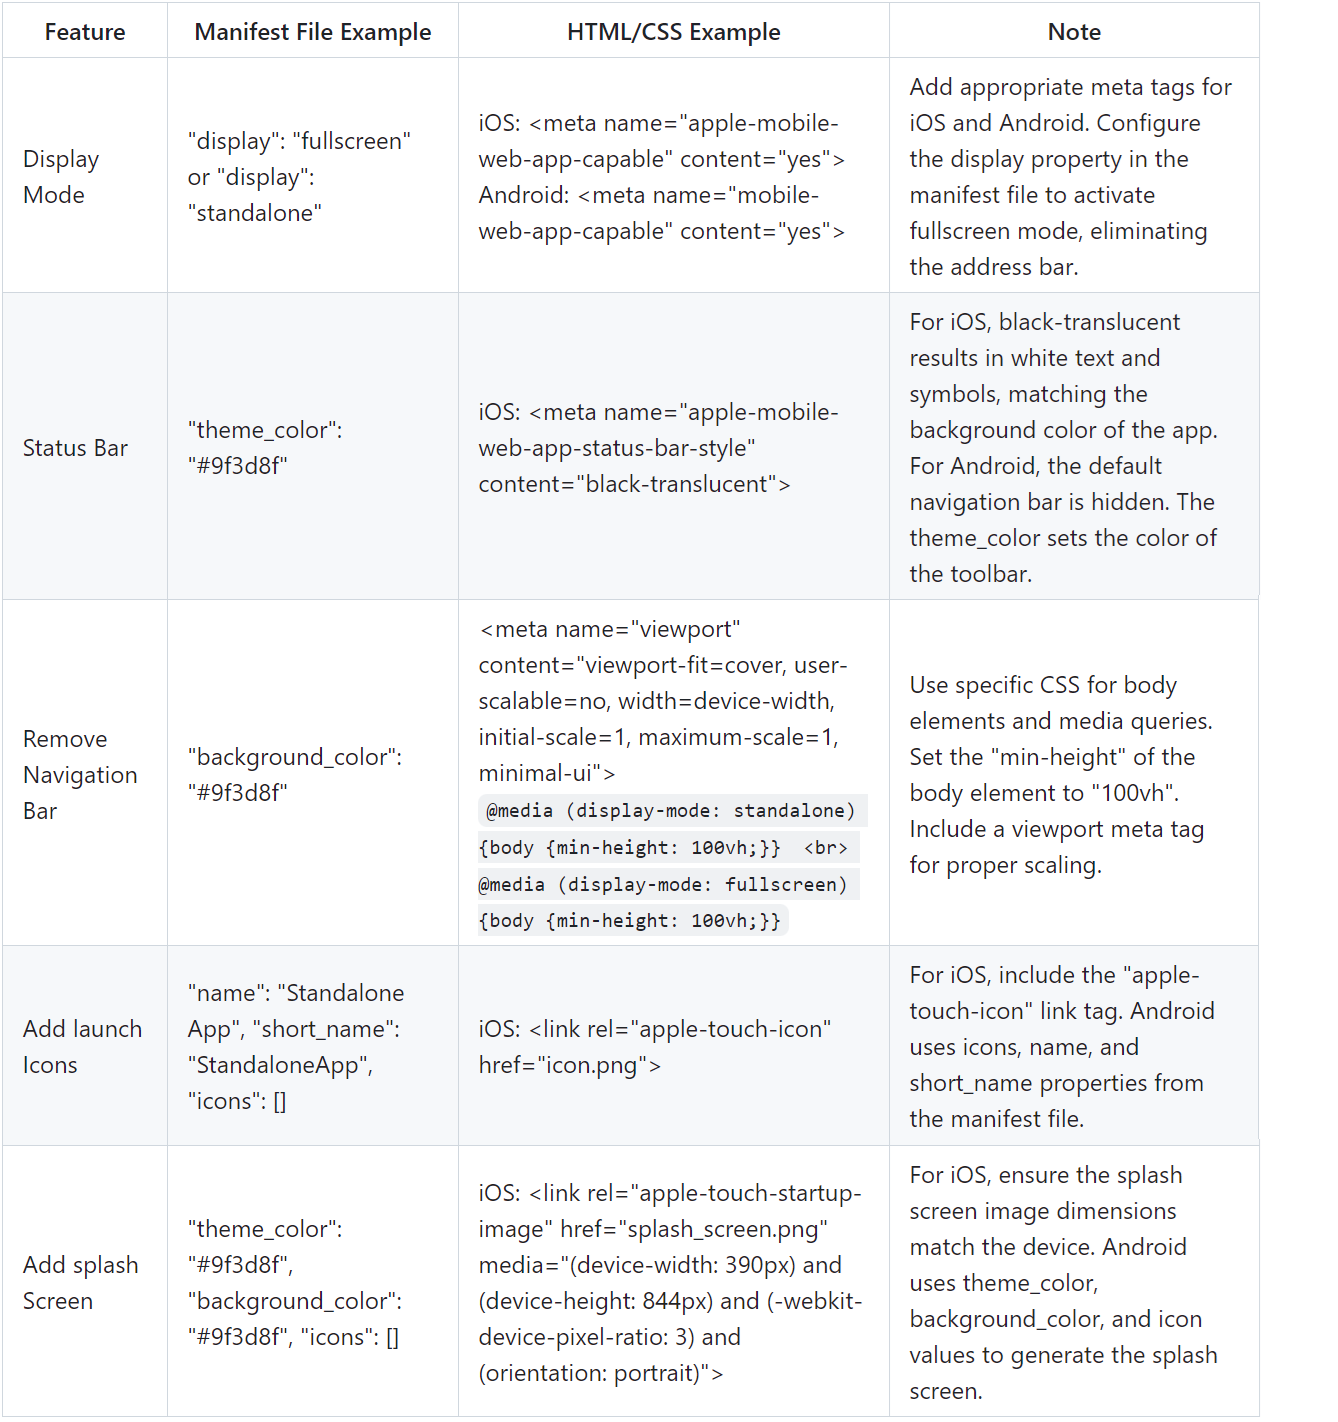
Here is a simplified table that combines iOS and Android information for each feature:
Additional Notes
- HTML and manifest examples column in the above table are for reference. When compiled, the HTML should appear as above.
- For iOS Display Mode and Add Launch Icons:
- Consider using SEOUtilsLibrary to add the necessary meta tags programmatically for better SEO management and control as in picture 3.
- Use the Metadata_AddTagValueName() action to add a meta tag.
- Use the Metadata_AddLinkValueName() action to add a link tag.
- For iOS splash screens:
- For example, to work on an iPhone 14, splash_screen.png would have to be of the size 1170 by 2532 pixels. The problem that arises here is that there are multiple iOS devices with different resolutions, and unfortunately, we cannot just simply repeat this code multiple times for images of different sizes. Instead, we need to use the media attribute to specify which launch image is intended for which device. If there is a large number of devices to support, you can use a list with necessary properties, to iterate through and append the corresponding splash screens to the HTML head element.
- Currently, the library does not support adding more than 2 properties (rel, href) for the link tag, so we utilize an OutSystems JS widget to achieve this as in picture 5.

Fullscreen Meta Tag Integration via SEOUtilsonSteroids Library - Picture 3
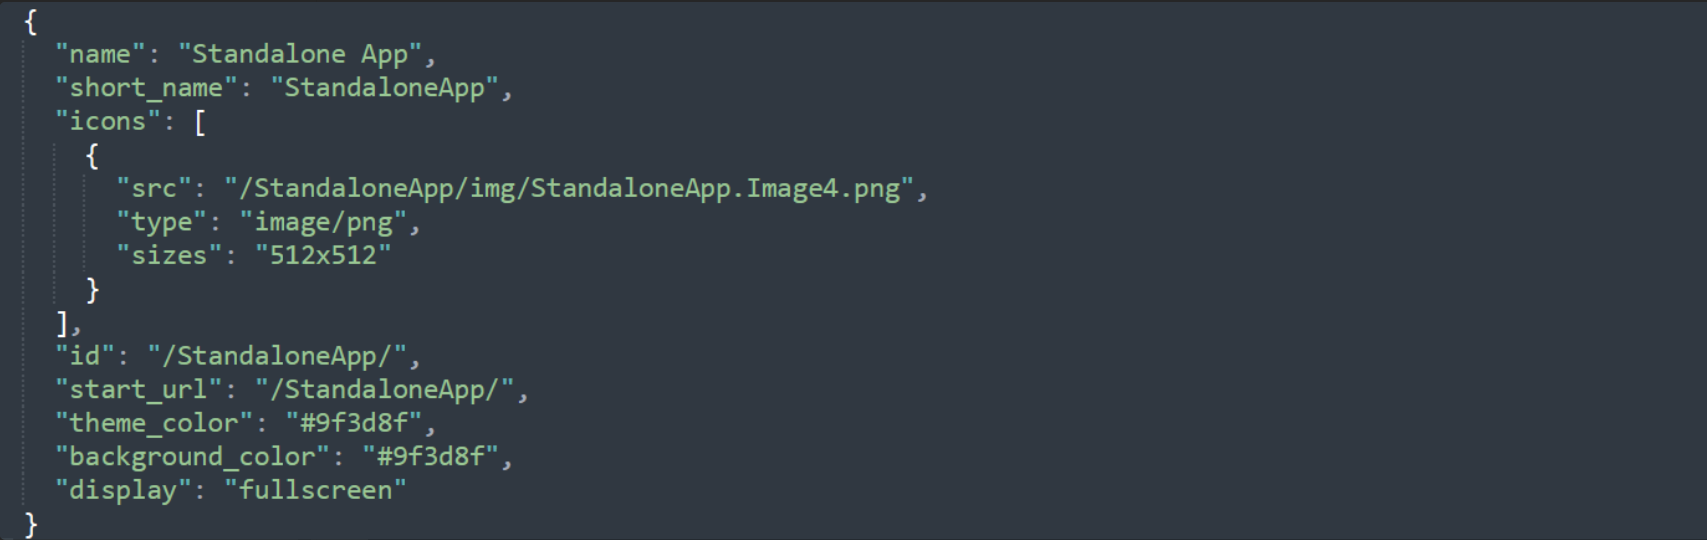
Setting Display Properties in the Manifest File - Picture 4
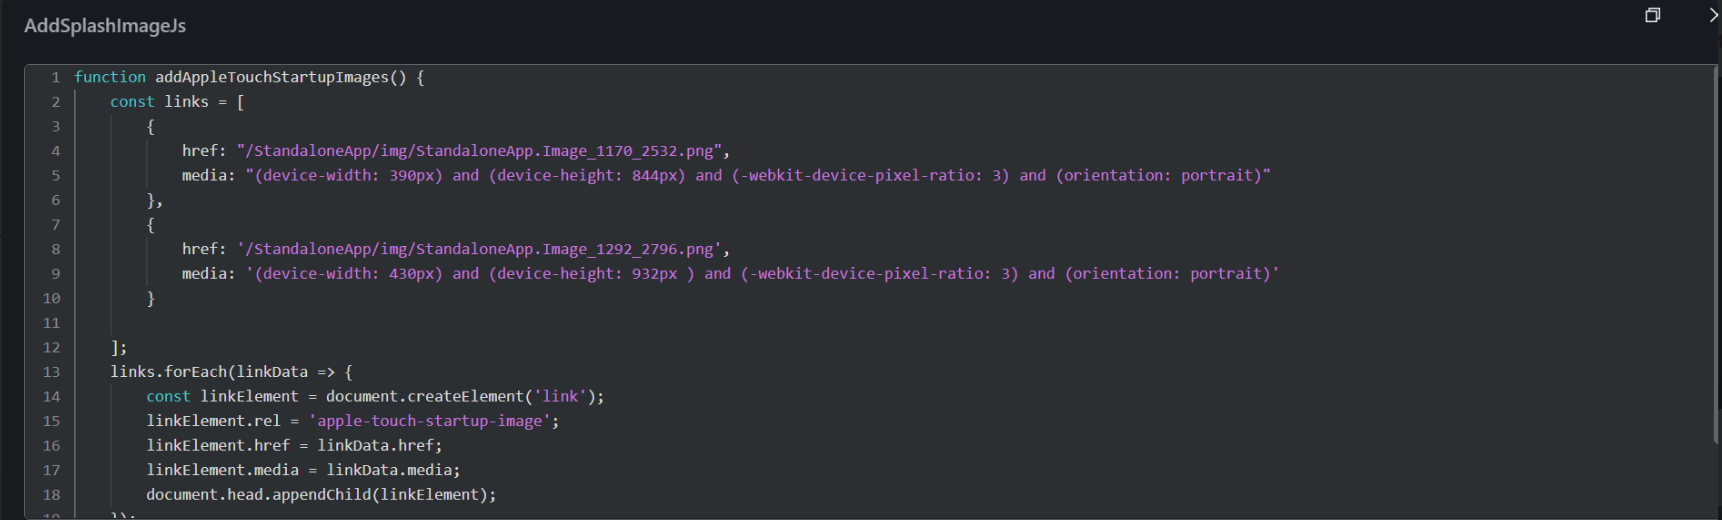
Splash Screen Link Tag Integration via JavaScript - Picture 5
Updating & Debugging the Manifest File
Debug Manifest File - Picture 6
To ensure the manifest is set up correctly, you can use Inspector in Chrome browser, follow these steps:
- Open your web app in a Chrome browser and Press F12 or right-click and select “Inspect” to open Developer Tools.
- In the DevTools panel, navigate to the “Application” tab.
- In the left pane, find the “Manifest” section and click on it.
- Review the manifest fields for correctness as parsed by the browser.
- If any issues are found, adjust your manifest file accordingly and reload the page to see the changes reflected in DevTools.
If the changes made to the manifest file are not reflected, it’s good to rename the file and update the link that includes the manifest file. This ensures that the latest file is loaded correctly by the browser. Here’s how to do it:
- Rename your manifest file (e.g., from manifest.json to manifest_v2.json).
- Update the Metadata_AddManifestFile action in picture 3 to reference the new filename.
- Publish the changes and reload the web page in the browser.
- Check the “Manifest” section in DevTools to ensure the changes are reflected correctly. By following these steps, you ensure that any updates made to the manifest file are properly applied and that the browser loads the latest version of the manifest file
Results in Action
To demonstrate the outcome, I developed a demo since the results of the original project cannot be shared publicly due to NDA restrictions.
Final Thoughts
As I wrapped up the project, I realized this journey was more than just making a web app installable—it was about pushing the boundaries of what OutSystems can truly do. Creating an installable app for both iOS and Android revealed the nuanced challenges each platform presents. While the core concepts of installability remain consistent, the implementation details vary. With Android, the process was relatively straightforward, thanks to its strong support for web app manifest, which allowed configuring installability and fullscreen mode. iOS, however, required a bit more finesse. We had to dive into custom configurations, like adding specific meta tags, tailoring splash screens for different devices, and tweaking HTML/CSS to ensure a smooth, fullscreen launch. This mix of low-code simplicity and custom configurations enabled us to bridge the gap and create the desired user experience.
In the end, hearing the product owner’s feedback—
“I’m very happy with the quality. It looks and works as intended.”
— was incredibly gratifying. It validated not only the success of the project but also the potential of low-code platforms like OutSystems to deliver high-quality, native-like experiences. However, this achievement wouldn’t have been possible without the invaluable support of Raimo Ilkka and Anna-Mari Vanhanen. Their dedication to testing the app on iOS, and their patience through countless test requests, installations, and iterations, truly made a world of difference in shaping the final product.