This is a short guide for installing EPiServer on a cloud server. Please feel free to ask questions if you have any problems. A guest lecture on the subject was held at Tampere University of Technology (.ppt slides)
The goal is to get EPiServer 7 up and running on a Windows 2008 cloud server. The URL of your server will be http://yourownaccount.no-ip.org. What you need to do is:
- Get a free domain name from No-IP.com.
- Get a free Windows 2008 cloud server from Upcloud.
- Configure your server and install the prerequisites.
- Install EPiServer on the cloud server.
- Browse to http://yourownaccount.no-ip.org.
Step 1: Get a free domain name from No-IP.com
- Register at No-IP.
- Create a new Host by clicking Add Host.
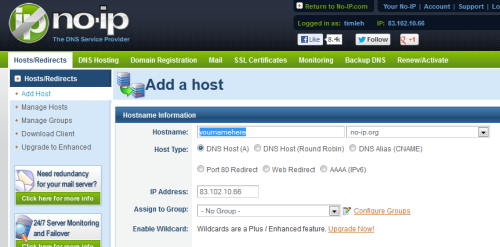
- Use the default values for the IP address and the other fields, and click Save.
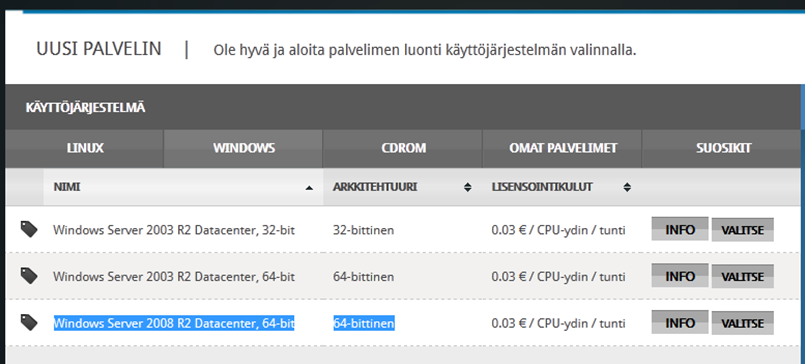
Step 2: Create a cloud server at Upcloud
- Register at Upcloud.
- Log in and create a new virtual Windows server (choose Windows Server 2008 R2 as the image).
- Enter yourownaccount.no-ip.org as the FQDN name.
- Click Create and wait until your virtual cloud server is ready. Choose the Send password to email option.
- Link the domain name to the cloud server: Copy the IP address of your server (e.g. 80.69.174.99) onto the clipboard. Paste the IP address to your host settings at No-IP.
- Wait a minute or two while the DNS records are being updated.
Step 3: Configure your server and install the prerequisites
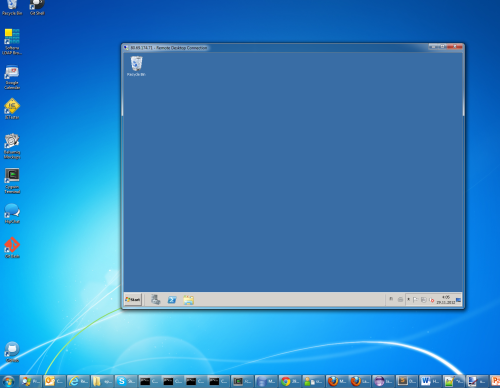
- Log in to the server at yourownaccount.no-ip.org with RDP: Start a Remote Desktop Connection from the Start menu (Mac users, start CORD) and enter yourownaccount.no-ip.org as the host name. Use the user name Administrator and the password sent to you by email.
- Now you should see the desktop of your server:
- Create a new user called episerver with administrator privileges: go to Control panel → Add or remove user accounts → Create a new account (choose Administrator as the account type).
- Log out and log in again, now as the user episerver.
- Install the .NET Framework 4: Download the installer to your desktop computer.
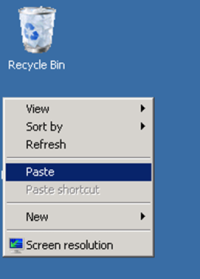
- Copy the file onto the clipboard.
- Paste the file onto the virtual server’s desktop:
- Install the .NET Framework by double clicking the installer on the server.
- Install ASP.NET MVC 4: Download the installer to your desktop computer. Then copy & paste the file to the virtual server, and run the installer by double clicking the file.
Step 4: Install EPiServer on the cloud server
- Install EPiServer 7: Download the installer, copy it to the virtual server, and run it there.
- When the installation is finished, start the Deployment center.
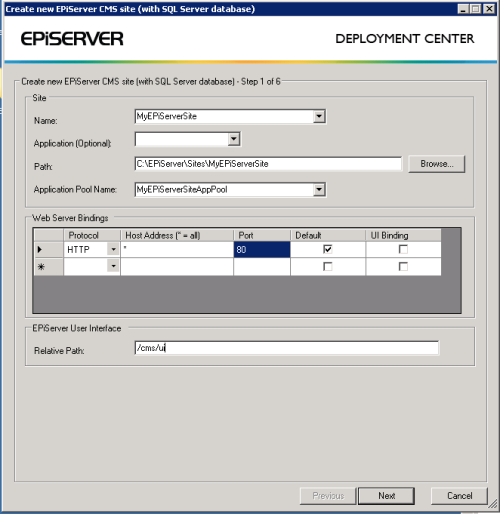
- Choose the option Install site and SQL Server database
- Use the default values for everything except the port (80) and the UI URL (/cms/ui). By using the port 80 your server will be available at the URL http://yourownaccount.no-ip.org
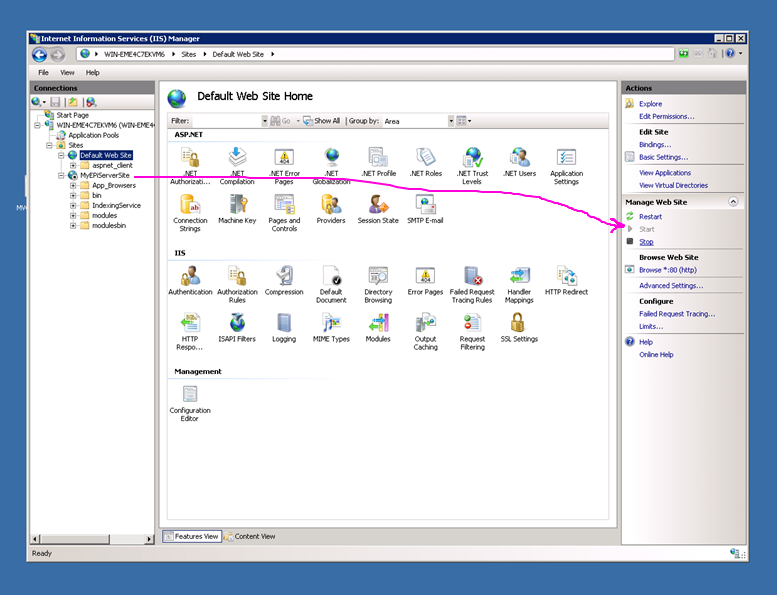
- You need to start your newly created application: Go to the IIS Manager (Start → Run, type IIS and choose IIS Manager), and stop the default site by choosing Stop. Then start the EPiServer site by selecting it and clicking Start.
Step 5: Browse to http://yourownaccount.no-ip.org
- Congratulations, you now have the EPiServer up and running, and you can start using it at http://yourownaccount.no-ip.org
- Finally, please add a comment to this page if you made it this far – just to know if anyone did it :) And if you encounter any problems, don’t hesitate to ask for help in the comments.